What is a Honeypot?
Honeypot is an anti-spam technique that uses a field hidden from humans through design options in Cascading Stylesheets (CSS) but remains visible to bots and spammers. By virtue of these annoyances’ programming, they will attempt to fill in every single field they can find in a web form. When it completes the hidden field, the Honeypot programming recognizes it as a fake submission and prevents the data from being captured, thus protecting the valid data submitted by human beings.
How to use your Honeypot Configuration Settings
- Using your admin panel, navigate to Manage » Configuration » Content authoring » Honeypot configuration.
- Honeypot configuration options:
- Protect all forms with Honeypot - Do not check
Reason: what's not obvious is that every page on your site is technically a form and you don't want to put this protection on every page; it will slow your ability to work in your site to a crawl. - Log blocked form submissions - Optional
Reason: if you want to get a sense of how much spam bots are trying to submit, you're welcome to enable this feature. - Honeypot element name - REQUIRED
Setting recommendation: a field name you likely won't reuse, like 'local_field'
Reason: The name of the Honeypot form field. It's usually most effective to use a generic name like email, homepage, or link, but this should be changed if it interferes with fields that are already in your forms. Must not contain spaces or special characters. - Honeypot time limit - REQUIRED
Setting recommendation: 12 seconds (up from the default 5 seconds)
Reason: Minimum time required before form should be considered entered by a human instead of a bot. Set to 0 to disable. Page caching will be disabled if there is a form protected by time limit on the page.
- Protect all forms with Honeypot - Do not check
- Honeypot Enabled Forms - We recommend protecting Webforms either all at once or on an individual basis. If you're using the site's default /contact (Content Us) form, be sure to check it in this list.
- Click Save configuration to finish.
Protecting Custom Webforms
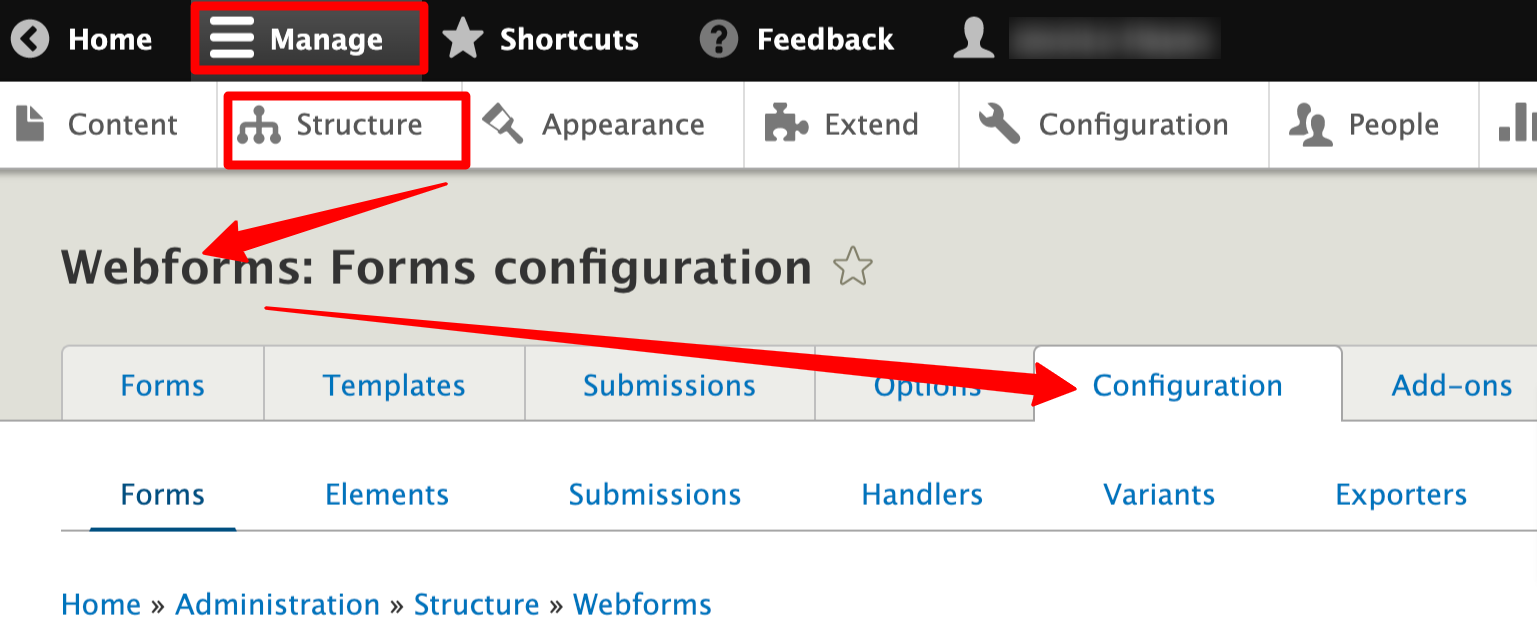
Navigate to Manage » Structure » Webforms.
To protect ALL Webforms:
- Click on the Configuration tab.
- Scroll ALL THE WAY to the bottom of the Form tab
- Check the Protect all webforms with Honeypot checkbox
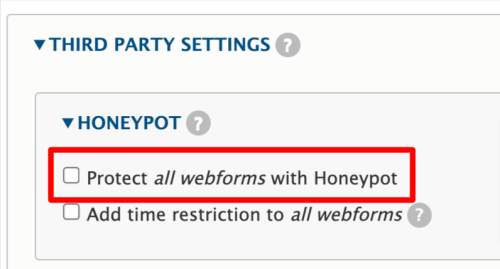
- Click Save Configuration to finish.
To protect individual Webforms:
- Locate your form in the list and click its Edit button.
- Click on the Settings tab.
- On the General sub-tab, scroll to the bottom of the screen and look for the Third Party Settings section.
- Check the Protect [YOUR WEBFORM NAME] webform with Honeypot checkbox.
- Click Save to finish.
- Repeat steps 1-6 for each form that needs protection from spam.