What is a View?
A View is a set of system instructions that will look for content containing criteria you define and then display that content according to how you set the output configuration options. A View creates a page to show output, but by itself is otherwise empty if no content meeting the defined criteria exists.
Your site, by default, already contains several Views; News, Blog, Events, People, Galleries, Content, and Content Audits, for example. If you visited these pages when you first received your site you'll have noticed that they didn't display anything unless it was the sample content to illustrate how the content can look. Several blocks are also Views, such as Upcoming Events or Recent Articles, which again rely on the existence of content matching its display criteria in order to show anything on the page.
What is this page about?
These steps are intended to help you duplicate the structure of an existing View, in this case, the Blog view, and create your own, very simple, output. It's a good introduction into the power of what Views can do for your site. This process requires you to define a new Article Type, then reference this new Type in your custom View. Once implemented, a user can start a new Article, set its Type to your new option and then, on publish, it will be dynamically added to your View display.
Why use it?
You may find that the Blog, News, or Events layouts are close to what you want, but don't address specific topic needs you may have for the collections of content you want to display. In the example below, we're working with a scenario where a College wants to have a section that displays news stories, spotlights, and profiles of their alumni.
Step 1. Create your unique Article Type
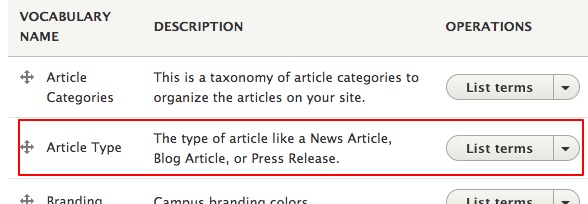
- Navigate to Shortcuts » Taxonomy (Categories)
- Locate Article Type in the list and click its List terms button
- Click the +Add term button
- Add your new article type name in the Name field
- Scroll to the bottom and click Save to finish.
Your new type is available in all of your Article content now.
Step 2. Duplicate an existing View to create your own
- Navigate to Manage » Structure » Views
- Locate the View you want to duplicate, like Articles Latest Blog

- Use the Duplicate button located on the far right
- Provide a View name
- Click Duplicate to finish.
Step 3. Customize your View
When you first duplicate the View, realize you’re making an identical clone. Without making any changes you’ve immediately added this exact same View to the site, including adding a new link on your primary navigation bar.
Note: any text in blue on the page is a clickable link in addition to any buttons or menus.
Please note the following names are restricted and will cause errors to occur because they are reserved for system purposes. Please avoid using these names for your View's paths.
- /core
- /libraries
- /profiles
- /sites
- /themes
- /modules
Update your Displays
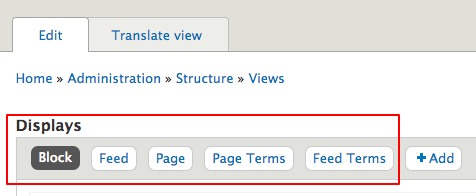
On the Block display screen:
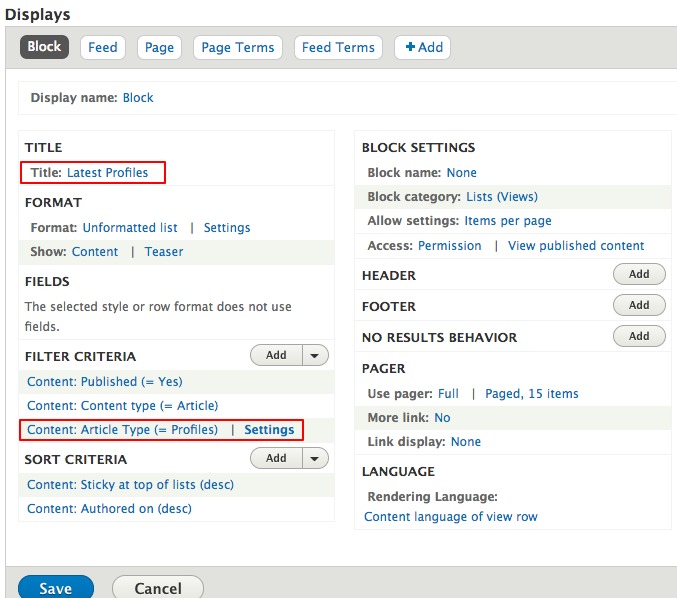
- Title
- Change the Title by clicking on the text.
- Filter Criteria
- Click on “Content: Article Type (=Blog) text
- Review the list under “Select terms from vocabulary Article Type” and pick the Article Type you added in the first step.
- Click Apply (all displays)
- Click Save
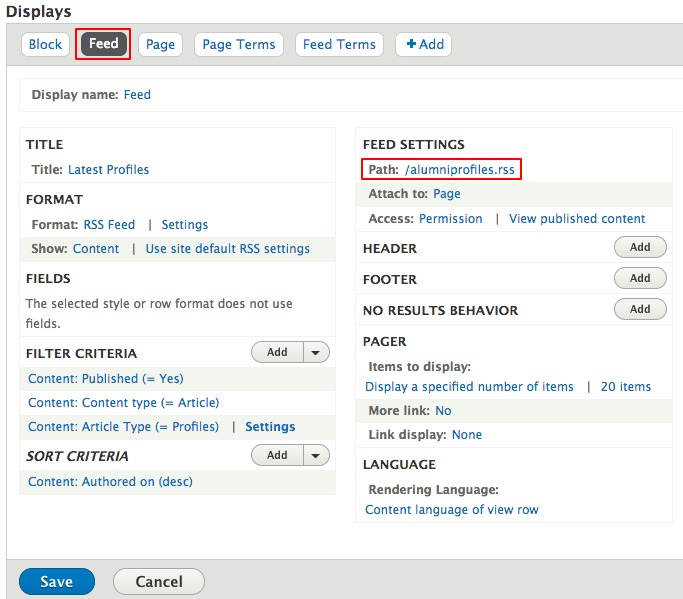
On the Feed display:
- Feed Settings
- Click on Path: /blog.rss
- In the Path field, enter in a name that mirrors your View's name. For example, if I call my new view “Articles Latest Profiles” I might want to call this “alumniprofiles.rss”
- Click Apply
- Click Save
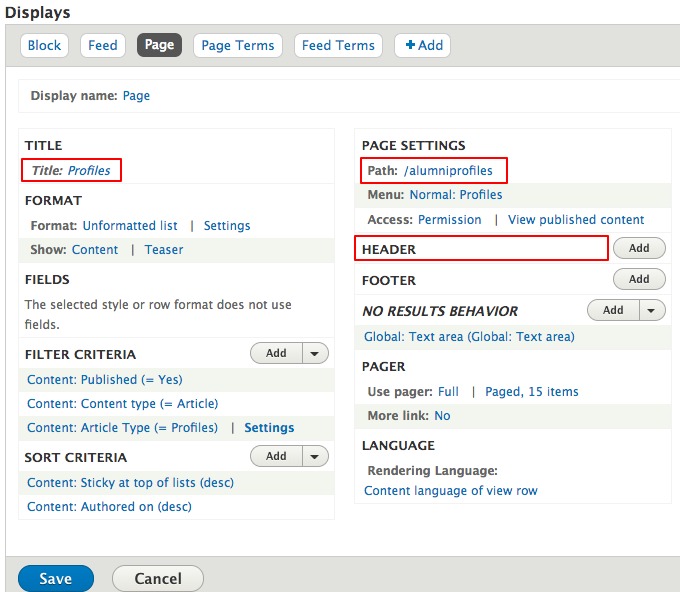
On the Page display:
- Title
- Change the Title by clicking on the text. This title will be displayed on the page visitors will see when they navigate to the list of content by this Article Type.
- Page Settings | Path
- Click on /blog
- This Path field is the URL output where the View will display. Unlike just about anywhere else in SiteFarm, you should NOT include a / before your path name. To continue with the above example, I might provide a path name of “alumniprofiles”. Keep a note of this path—you’ll need it to create a link later.
- HEADER: Global: Unfiltered text (Global: Unfiltered text)
- It's possible, depending on which View you duplicate, your View will display a title other than the one you want. This link will allow you to fix this issue.
- Click on 'Global: Unfiltered text (Global: Unfiltered text)'
- In the content field, you will see the following: '<h2 class="panel__title">Latest News</h2>'. You can either update the text "Latest News" to your preferred title OR use a token. A token is a placeholder that will insert a pre-defined value. In this case, you could replace the line with the token [view:title] and it will grab your previously declared Title information. If this View is duplicated in the future, the token will update to display the new title information if you update it.
- Click Apply
- Click Save
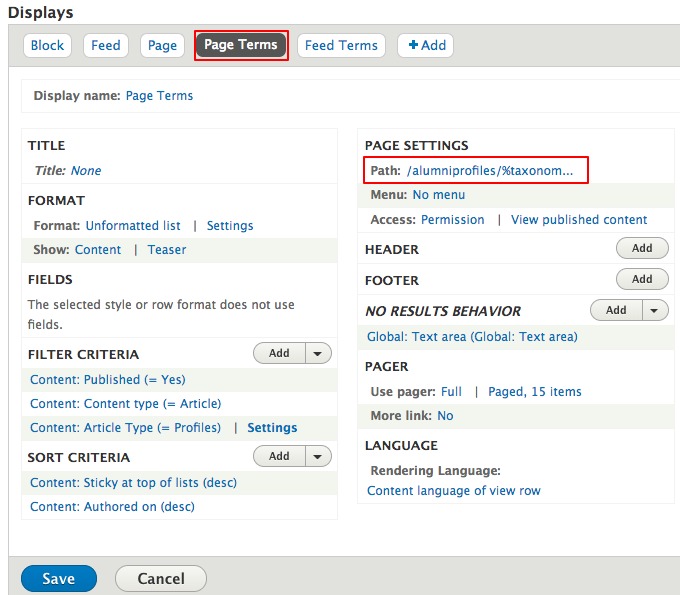
On the Page Terms display:
- Page Settings | Path
- Click on the path (ex. /blog/%taxonomy_term
- In the path field, only update the first part of that path. Change (in this example) blog to profiles so it looks like “alumniprofiles/%taxonomy_term”
- Click Apply
- Click Save
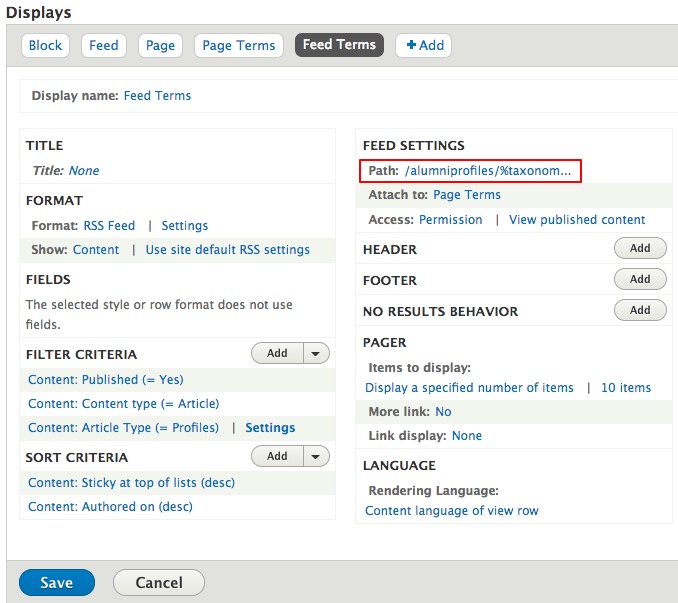
On the Feed Terms display:
- Feed Settings | Path
- As in the Page Terms section above, only update the first part of the defaulted path information to match the View name you’ve been using throughout the steps so far. So, in this case, I would write “alumniprofiles/%taxonomy_term/feed”
- Click Apply
- Click Save
Step 4. Create content that uses your Article Type and displays on your View
Verify that you can create a new Article <your article type>.
- Either create a new article or edit an existing article
- Under Additional Options, expand the “Categorizing” tab and update the Article type menu to display the type you created.
- Include your other content as desired.
- Click Save.
Step 5. Add a drop-down link to your Main Menu if it's not there already
Create a new link on your primary nav (main or drop-down) on which your View will display.
- Navigate to Manage > Structure > Menus > Main Navigation > Edit Menu or Shortcuts > Main Menu.
- Click +Add link.
- Provide a Menu link title.
- In the Link field, enter in the path you created in On the Page Display in the View’s Page Settings | Path section.
- Decide where the link will live—either as a primary link on the menu or as part of a drop-down on an existing parent link.
- Click Save to finish.
- Navigate to your link to see if your content is displayed.