Gunrock wants to make efficient use of all areas of his site and realizes he almost overlooked the footer and footer credit regions. In thinking about it, he decides he wants to create a series of menus with relevant links for target audiences or topics he wants to make available from every page of the site. He also realizes this would be a great opportunity to include some site credit information.
Step 1: Create the menus
- Using your admin panel navigate to Manage » Structure » Menus.
- Create between one and four menus for this region. If you're unfamiliar with how to create custom menus, review the documentation.
Step 2: Place your custom menus
- Using your admin panel navigate to Shortcuts » Blocks to go to the Block Layout screen.
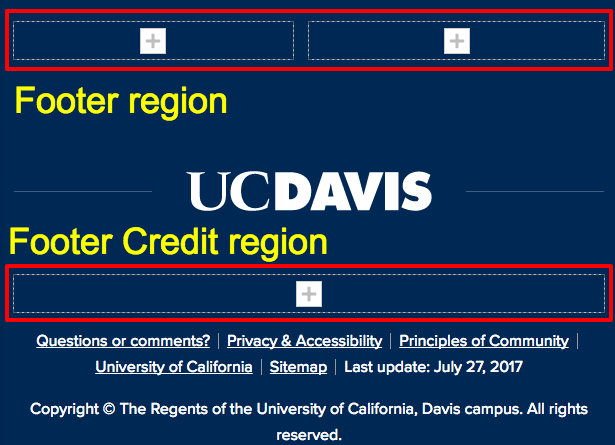
- On the Block Layout page, scroll down until you locate the Footer and/or Footer Credit regions. If you've been using the Place block button while on a specific page and are wondering why we don't do this from, say, the home page, being on this screen will give us more granular and immediate access to our list of blocks in this region, making it easier to reorder them if necessary.
- Click on the Place Block button and select the menu you created that should appear in the Footer or Footer Credit region. Click Save block to insert.
- Repeat this process until you've added all your menus or blocks.
- Review the list of blocks in your Footer regions. Remember, the top of the list is closest to the left of the screen on display, so reorder your menus if necessary. If you do make changes, make certain to scroll down and click the Save blocks button to finish.
Step 3: Add the Site Credit block
- The Site Credits block contains the following configurable options:
- display site logo
- display site name
- display site slogan
- display site credits information (defined by you in the Manage » Configuration » System » Basic site settings section), which includes a WYSIWYG field for additional information and/or links.
- Click the Place Block button in the Footer region and search for the Site Credits block. Configure it and save it to this region.