A bug has been detected with the permissions for this feature. Please submit the Service Request form to have them enabled for you.
What is SiteFarm Advanced Access?
Advanced Access is a combination of two modules—Workbench Access (a contributed module by the Drupal community) and a custom SiteFarm module—designed to give Site Managers a way to restrict editing access by role or by user account through either taxonomy or menu structure (excluding pages using Views). Advanced Access includes a brand new role, called Section Editor, that is paired with the Contributor role to provide the necessary permissions to use this system. Users with the Editor role cannot participate in this feature and can work unaffected if this module is enabled.
Enabling SiteFarm Advanced Access
This step requires that you either have the Site Builder role or that you contact the SiteFarm team and request we enable the module for you. If you are a Site Builder, please follow the steps outlined below.
- Navigate to Manage » Extend.
- Filter for SiteFarm Advanced Access.
- Click Install.
- When the system indicates that it also needs to install Workbench Access press Continue to do so.
- You should receive a message indicating the module was successfully installed.
- Contact us to request we enabled the necessary permissions for you.
What is an Editing Scheme
Workbench Access utilizes a system called Schemes, which can be based on either your site's taxonomy or menu links. The scheme you create controls what content is included in the restricted group and allows you to control which of your users with the Contributor/Section Editor roles can edit.
Important Considerations
- Using more than one Scheme type at a time can cause conflicts that break all of your Schemes. We strongly recommend using one or the other, but not both Menu and Taxonomy at the same time unless you take extra care that the areas of restriction do not overlap.
- Basing your scheme on the main menu only allows you to assign users to page content that is part of that menu structure. If your main menu includes links to View (news, blogs, events, photo galleries, people directory), the content listed on the View page won't be included because its content is part of the body content and not part of the menu. Compare this to your pages (Article, Basic Page, Person page, Event page, Photo Gallery page, custom content types) which are statically present after you create, add then in the Menu Settings, and save.
- Using taxonomy is the most versatile option and gives you the greatest amount of granular control.
- Taxonomy based-scheme: if you want to lock your Section Editors down to ONLY the content you choose and nothing else, you MUST select all the available taxonomies/vocabularies in your taxonomy scheme settings; failing to do so means that any content type not included will still be available to Section Editors for editing.
- Menu based-scheme: if you want to lock your Section Editors down to ONLY the content you choose and nothing else, you MUST select all the available menus/content types in your menu scheme settings; failing to do so means that any content type/menu item not included will still be available to Section Editors for editing.
- Custom content types: if you want Section Editors to work on content that uses custom content types you've created, you must set the permissions in order for them to do so, otherwise they won't have access. Please refer to the Node View Permissions documentation for steps on updating permissions.
Example Demonstration Video
Select and Configure your Users
We have created a specific role—Section Editor—to be used in conjunction with the existing Contributor role. The combination of these two roles provides the necessary permissions to participate in the content access process. All other roles, those provided by default or custom roles created for your site, are unaffected by the content access restrictions.
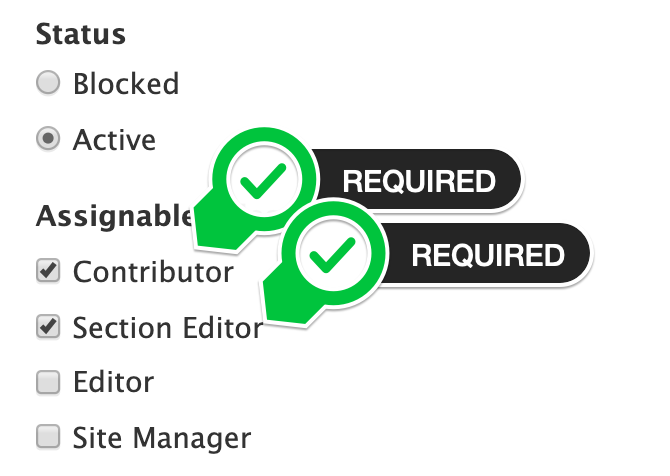
When configuring your users for content access, select BOTH the Contributor AND Section Editor roles.
No other roles should be selected.
Doing so may have unintended consequences by extending your Section Editors'
access to areas they shouldn't be able to edit.
Create a Menu-based Scheme
- Navigate to Manage » Configuration » Workflows section » Workbench Access.
- Click the + Add Access Scheme button.
- Provide a Label name and Plural Label name.
- From the Access Scheme drop-down menu, select Menu.
- Click Save.
- On the next screen, you will be provided with a list of menus and content types. Because Section Editors don't have administrative level access, stick to menus that relate to the main menu or to sidebars for secondary menus in subsections of your site.
- Check the boxes for the content types you would like to include.
- Click Save to finish and you will be returned to the main Scheme dashboard.
- Proceed to assign your users or the Section Editor role.
Create a Taxonomy-based Scheme
- Navigate to Manage » Configuration » Workflows section » Workbench Access.
- Click the + Add Access Scheme button.
- Provide a Label name and Plural Label name.
- From the Access Scheme drop-down menu, select Taxonomy.
- Click Save.
- On the next screen, you will be provided two lists: 1) your site's vocabularies and 2) the associated Entity Bundles. The easiest way to proceed is to match the vocabulary type with its related Entity Bundle. Example:
- The Tags vocabulary could be associated with any Bundle type whose Field Name is Tags, which means you could select any combination of Article, Basic page, Person page, Photo Gallery, and/or Event.
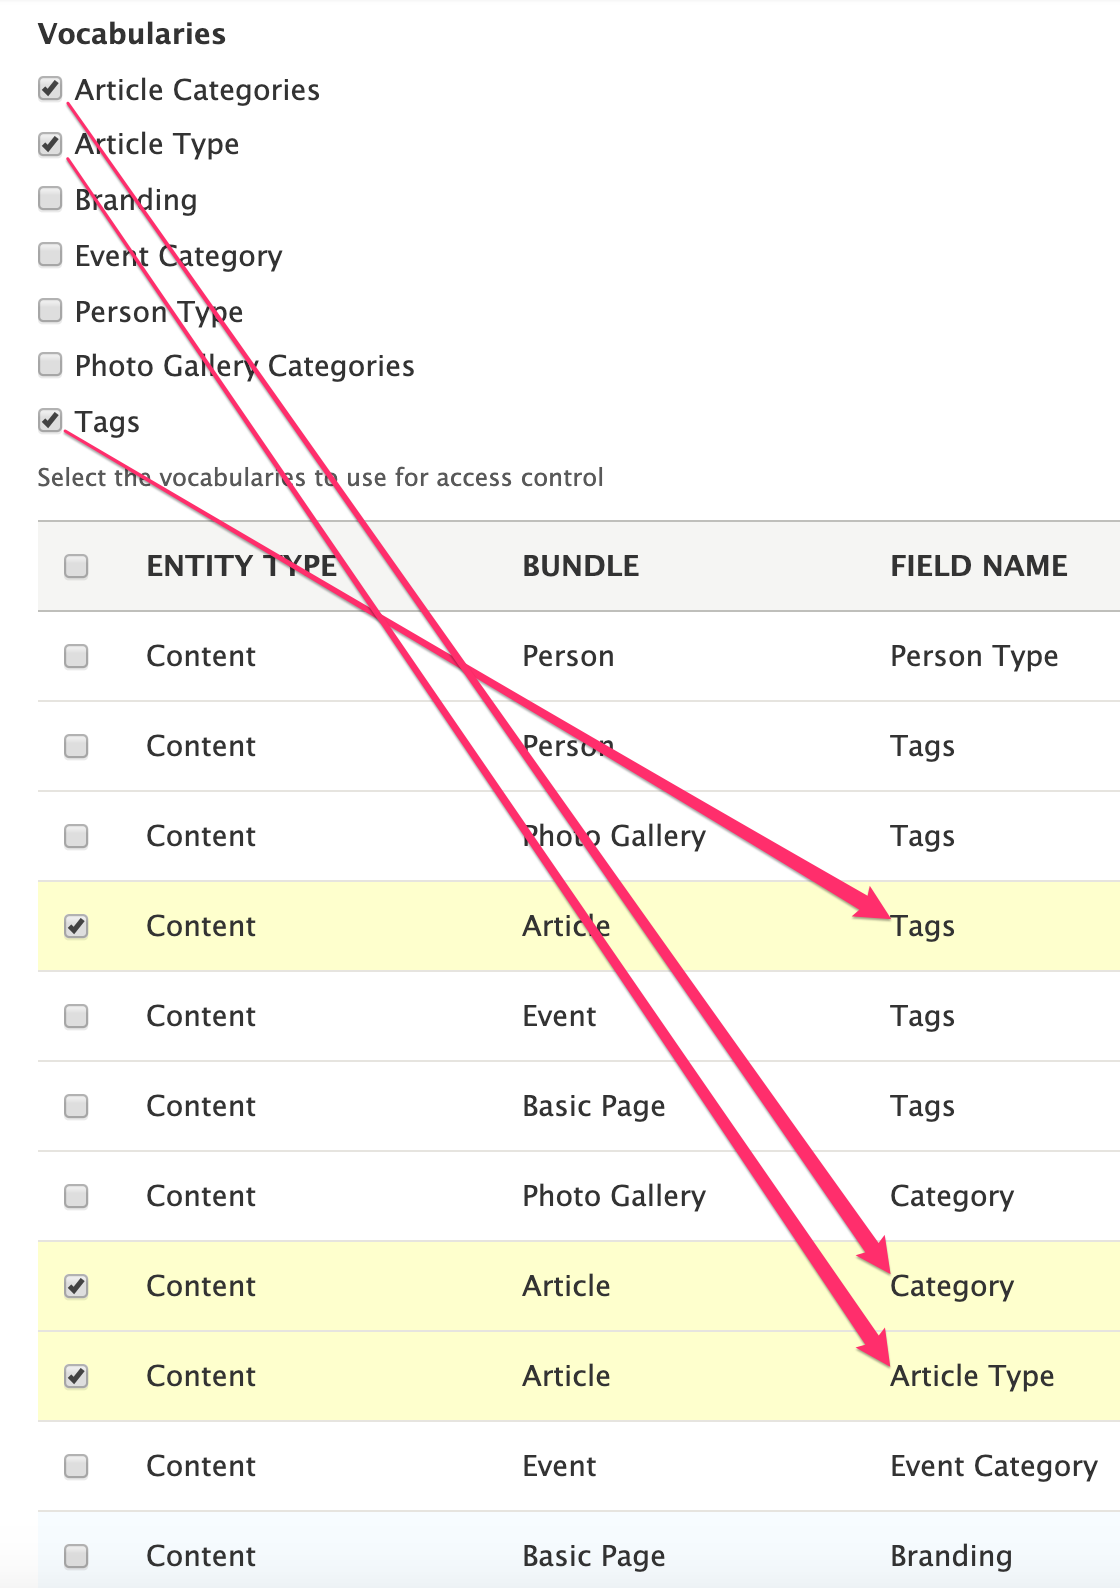
This is an example of locking down the Article type and utilizing the Article's Tags, Category, and Type as methods of assigning access. - Warning: Mismatching or leaving out a related vocabulary could result in a system error. If this occurs, update your selections and try again.
- Note: Be aware that anything you do NOT select could potentially still be available to your Section Editor for editing. If you would like to lock down your entire site so you can control what Section Editors can be assigned to access, select all the vocabularies and all the entity bundles.
- Click Save to finish.
- The Tags vocabulary could be associated with any Bundle type whose Field Name is Tags, which means you could select any combination of Article, Basic page, Person page, Photo Gallery, and/or Event.
- Click Save to finish and you will be returned to the main Scheme dashboard.
- Proceed to assign your users or the Section Editor role.
User Assignment
Assign content by user or by role
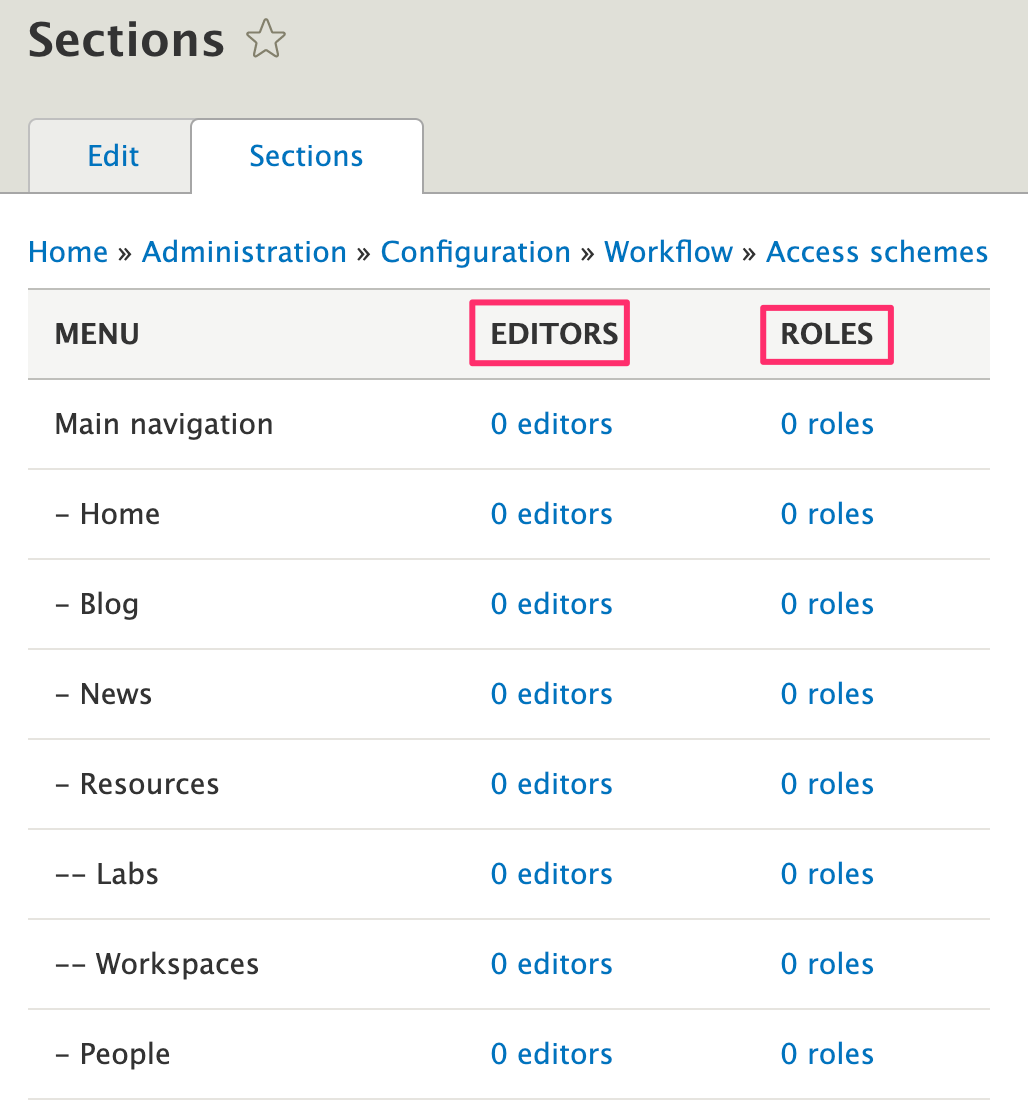
- While on your main Scheme dashboard, under the Operations column, click on the Sections button for your scheme.
- The screenshot below illustrates a menu output with the titles EDITORS and ROLES displayed in columns. Each row can have one or more individuals assigned or the entire Section Editor role assigned.
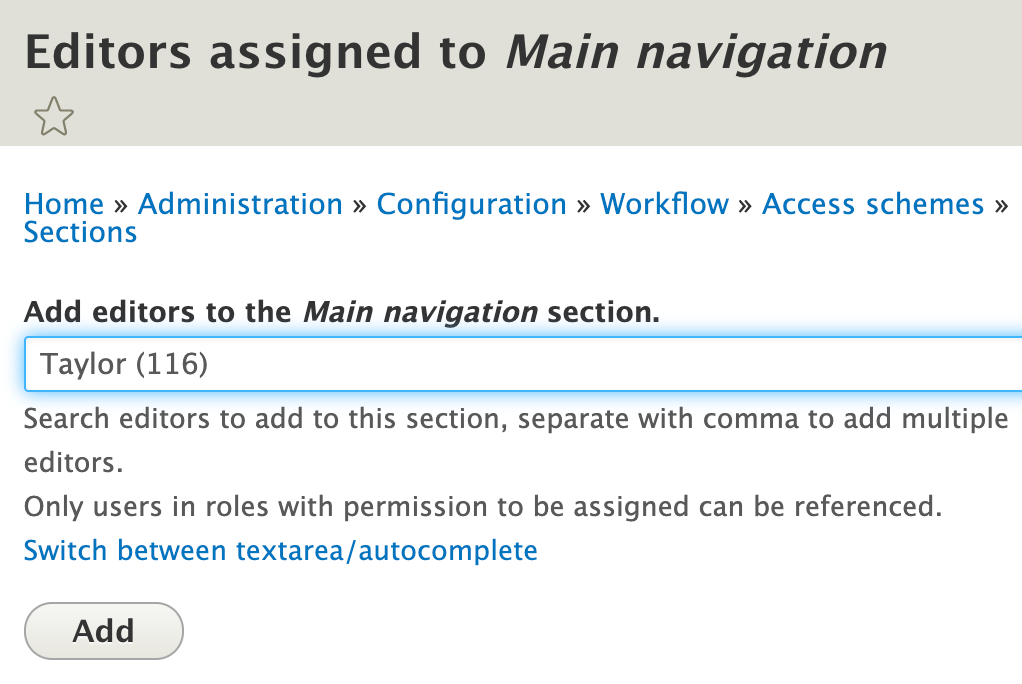
- Add individual users:
- Clicking on the 0 editors for any row will provide you with this screen where you can use the autocomplete field labeled Add editors to the <scheme> section to type in the user name of those to be assigned.
- If you need to add more than one person, separate their entries with a comma.
- Click the Add button when finished.
- Add everyone in the Section Editor role:
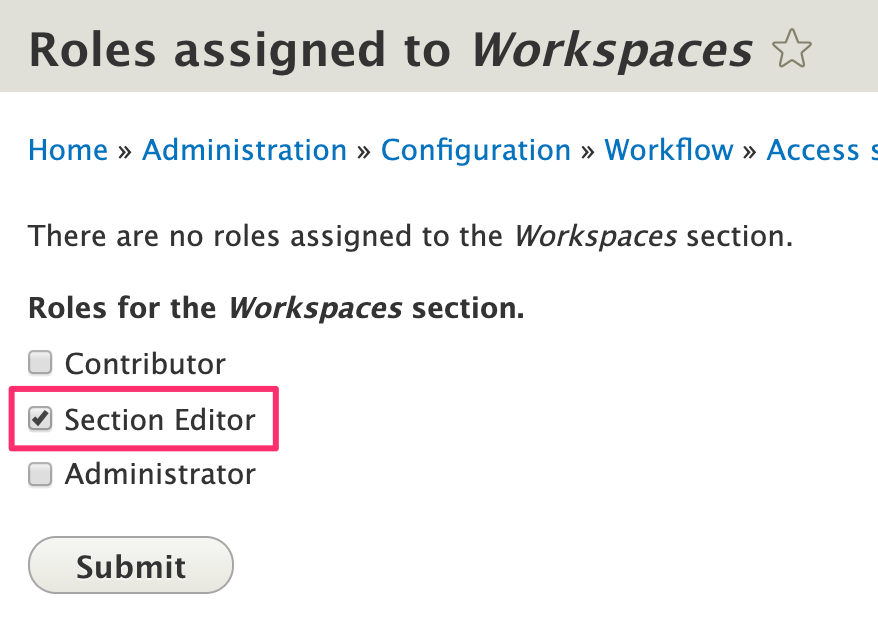
- Clicking on the 0 roles for any row will provide you with this screen where you will check the role box for Section Editor. Note: do not select any other role for this entry; their permissions have not been configured to be compatible with this system.
- Click Submit when finished.
- Clicking on the 0 roles for any row will provide you with this screen where you will check the role box for Section Editor. Note: do not select any other role for this entry; their permissions have not been configured to be compatible with this system.
Modify/Remove existing Section Editors
- To remove individual users:
- Click # editor for the editor(s) you want to change in a given row. The # notation indicates the number of users assigned in that section.
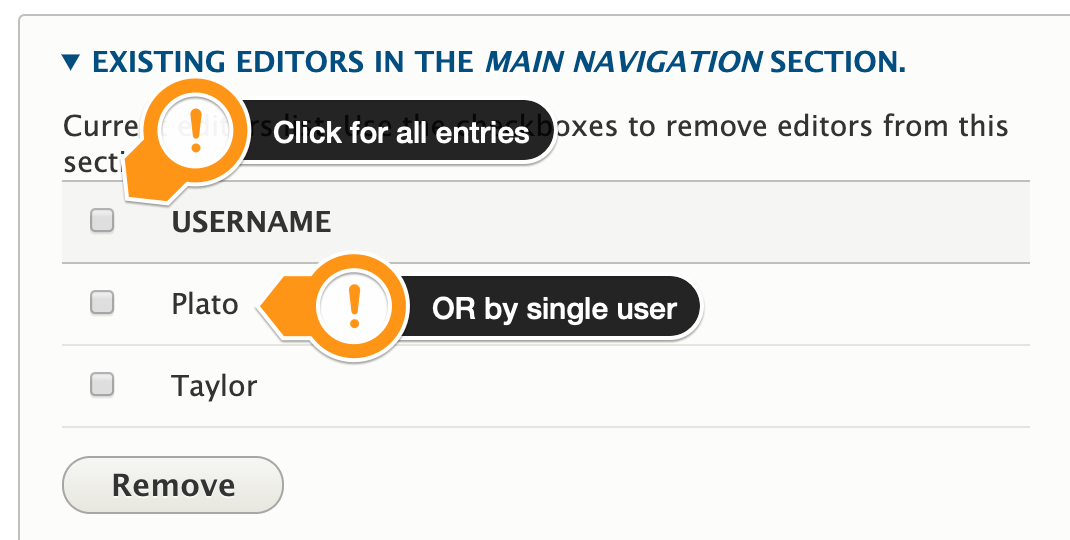
- Select the box next to the USERNAME label or the box(es) next to individual entries, then click Remove to complete the step.
- To remove all access for the Section Editor role:
- Click 1 role for the given row. The 1 notation indicates the number of roles assigned in that section.
- Uncheck the Section Editor role checkbox.
- Click Submit when finished.