
"My footer image keeps disappearing"
This issue crops up when an image is added in the Site Information WYSIWYG; the image displays for a week or two and then mysteriously breaks for no discernible reason. Let's explore what's happening behind the scenes and how to implement a fix.
Where the issue occurs
If you navigate to Manage » Configuration » System section » Basic site settings, the page gives you a text area WYSIWYG under the label "Site Credit Information." I created an example that, in the content area, looks like this:
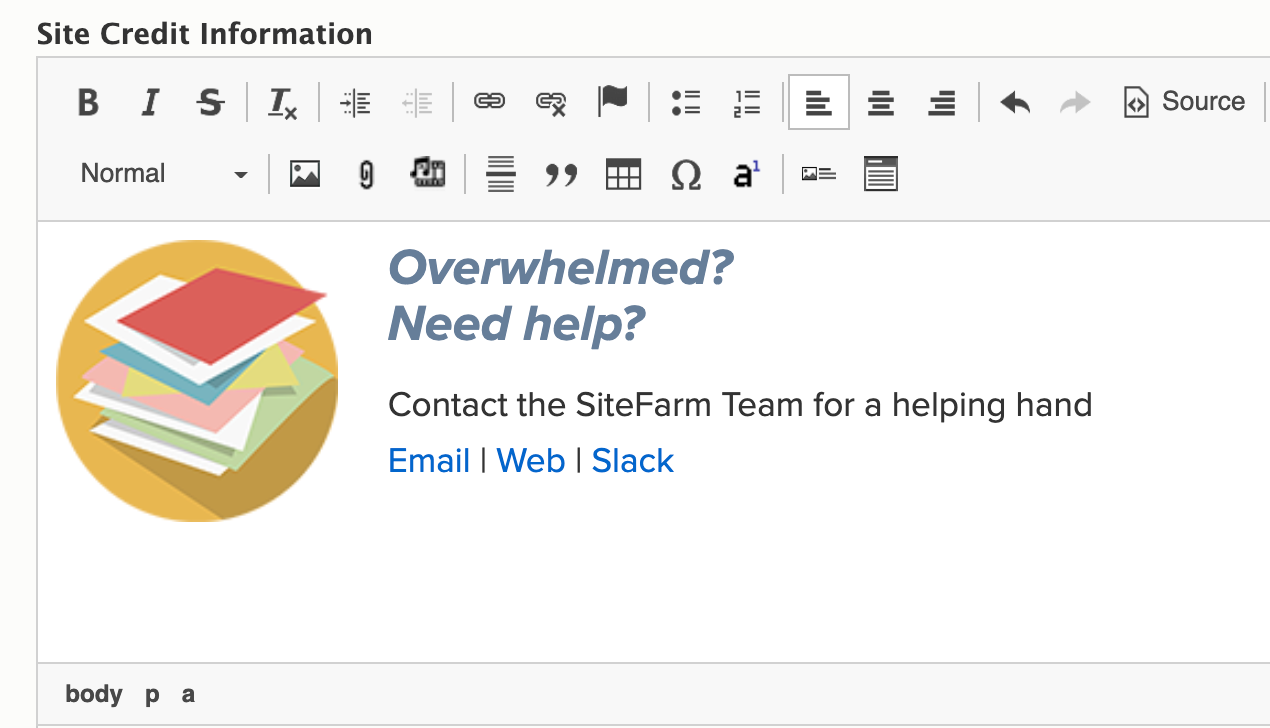
When saved, it's added to the Site Credits block in the Footer region and is displayed on the page like so:

What's your status? Permanent vs. Temporary
Now, as far as any reasonable person is concerned, you've attached your image to the site and all's well. Unfortunately, the way Drupal handles file attachments, some Core bugs, and our code base have combined to create a situation where, because the image isn't attached to a page the file is assigned a status of Temporary instead of Permanent as we would expect.
Permanent, as the name suggests, means the file is a permanent entity in the site and should be kept. The Temporary status means the system doesn't see the file is attached to a page entity and will be slated for a cache clear in the near future (approximately two weeks) depending on where your site is in its schedule for such system jobs. When the job runs, it removes files labeled "Temporary" from your system resulting in the broken image problem.
How to confirm your image's status
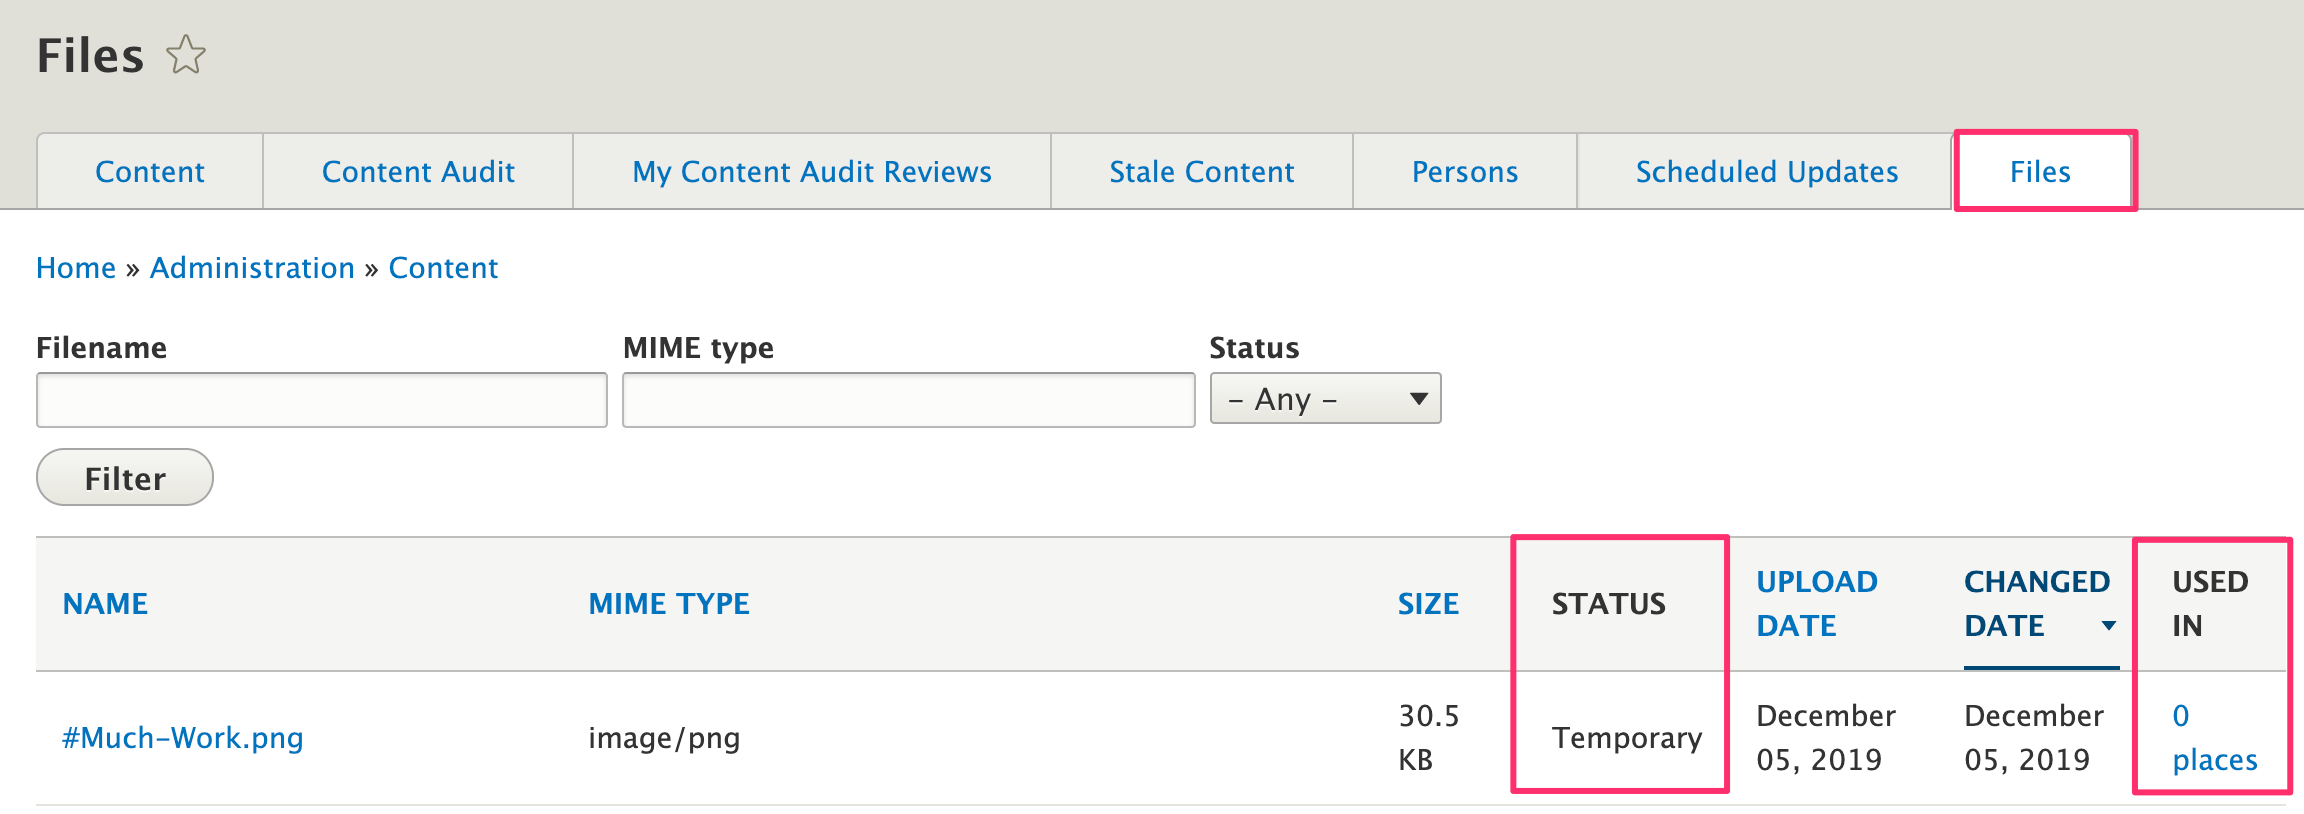
If you suspect your site is experiencing this problem, you can confirm if this is the case by viewing the file's status.
- Navigate in your Admin panel to Shortcuts » All Content » Files tab.
- Locate your image in the list and review its Status.
An interim fix
Having isolated the nature of the problem, our development team is now exploring a suitable fix for this problem, but in the meanwhile we want to give you a way to work around the issue to avoid the need to constantly replace the image.
- Create a page—the basic page is probably the easiest to use in this case.
- Consider adding a very clear title and/or body text explaining what this page is being used for and that it shouldn't be deleted.
- Add your image to the body WYSIWYG.
- Do not publish the page. Save it in Draft. This is vital to the process and ensures that, while the image is now a Permanent piece of content in your site, this is obviously not a page you want to show the public.
- Edit your page.
- Click on the Source button in the top icon bar and locate the HTML source code representing your image. It will look something like this
<p><img alt="Site credit information as inputted in the wysiwyg." data-entity-type="file" data-entity-uuid="blah" height="284" src="/sites/g/files/blah/files/inline-images/site-credit-wysiwyg.png" width="496" /></p> - Copy this information.
- Navigate to the Basic site settings section noted above, go to the Site Credit Information WYSIWYG.
- Click on the Source button, paste your code into the field.
- Click on the Source button again to return to the text interface mode and add any additional text necessary
- Scroll to the bottom and click the Save configuration button to finish.
If you check your Files list now, you'll see that the Status setting has changed.
