
Using bullet list styles for aligning linked text and images horizontally
You don't always want to use blocks to create the layouts you want; sometimes it would be so much nicer just to, somehow, embed your images and some text across your page. And would an embedded link be too much to ask? Ask away— we have your solution for you.
Steps for Setting up your Text, Images, and Links
- Prep all your images ahead of time so they are the exact same dimensions. The ones used in this example have been set for a landscape orientation, 72 dpi, 300x200px.
- If you're going to include links to something other than web pages, like Office files or PDFs, you'll want to create a page just for PDF uploads that you're not going to publish. Until such time as the media library becomes available, this workaround for linking files is our interim solution.
- Once you upload your files, go to Shortcuts » All content » Files tab and locate your files. Right click on the file and choose 'copy link' or 'copy URL'. Your link, when pasted somewhere safe, will look like this: https://sitefarm.ucdavis.edu/sites/g/files/dgvnsk261/files/inline-files/2005_Winter.pdf. When you embed your link, you're going to do it just like do any other internal link in your site by omitting the domain information, which in this case is https://sitefarm.ucdavis.edu. So, you'll paste in everything from /sites/g/... forward.
- If including text, keep all your titles BRIEF -- you don't want them wrapping to a second line or you'll throw off your alignments.
- Start by entering your titles, highlight them, then click the bullet link icon. When you do that, you'll have the beginnings of your bullet list. Continue filling out the list.
- Style your title if desired. In the example that follows, all titles were given the Subtitle 3 style.
- (Optional if not using a subtitle style) For each title, put your insert point at the end of the title text. Use Shift + Enter once or twice. This is going to create a little space between the title and your image (if desired). After you create the space, use the Insert image icon to add your image. Continue this step for your other titles.
- Highlight your title and the associated image, and insert your link using the regular Link icon, embedding the link as described in step #2.
- Highlight your list and then click on the Style menu button located on the second row of the WYSIWYG bar and look for the "Pipe List" option. It's going to transform the list from vertical to horizontal.
- Save to finish.
Benefits to this approach
- Accessible
- Mobile-friendly
- Will resize automatically based on visible width available to the images
- This is a pipe list, so you will see the divider line between each image. If this doesn't work for you, you can apply your own styles via sub-theming or the CSS Editor
Demo Layout
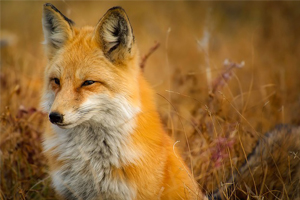
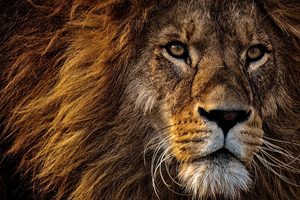
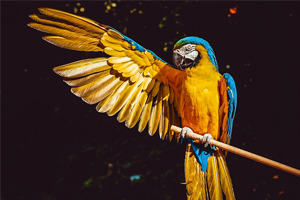


*Images courtesy of Pixaby, linked PDF on Snow Leopards from the World Wildlife Fund.