
Intranet: Register non-UC Davis users with moderated approval
Dec 15, 2020 - These instructions have been discovered to out-of-date due to updates to the SiteFarm platform. New instructions will be provided in early 2021. Contact the SiteFarm team if you have questions.
Scenario
A SiteFarm client is using their site to host information and links related to an annual conference. The site storehouses embedded links to videos recorded from the conference, but in order to access them, public visitors need to pay a registration fee through a different payment gateway before being granted access to the site's content.
The client had the following requirements:
- Lock the site as an intranet
- Allow the public to create their own user accounts
- Keep those accounts as "pending" until a site manager could cross-reference the account information to the payment information
- Assign an appropriate role to these visitors to distinguish them from regular site Contributors, Editors, or Site Managers, and give them read-only privileges to the content
- Make sure they didn't require CAS to log in
- Provide login and logout mechanisms
Who can complete this configuration?
Certain steps in this process can only be completed by a member of the SiteFarm team, and the rest will depend upon whether you have a Site Manager role or the Site Manager AND Site Builder role. When each step is described, a note will be included as to which group has the ability to complete the step.
If in doubt, drop us a note at [email protected].
Configuring Your Site Settings
Create the new user role for public visitors
Can be completed by: SiteFarm Team only
A new role needs to be created in order to easily identify the visitors who are being given access to the site. In our use case, the client opted to name them "Virtual Attendees" (VA). The new role is then placed directly after the Authenticated User in the Roles permission list in order to inherit the Authenticated User base permissions.
The new role is intended to provide READ-ONLY privileges to your authenticated visitors. They will NOT be able to edit any content on your site.
Reorganize the user permissions
Can be completed by: SiteFarm Team only
This step reconfigures the site's entire permission structure to make it inaccessible to the public. Any permissions provided under Anonymous User in your default site offering are removed.
Include the new Role as an option for Site Managers to apply
Can be completed by: SiteFarm Team only
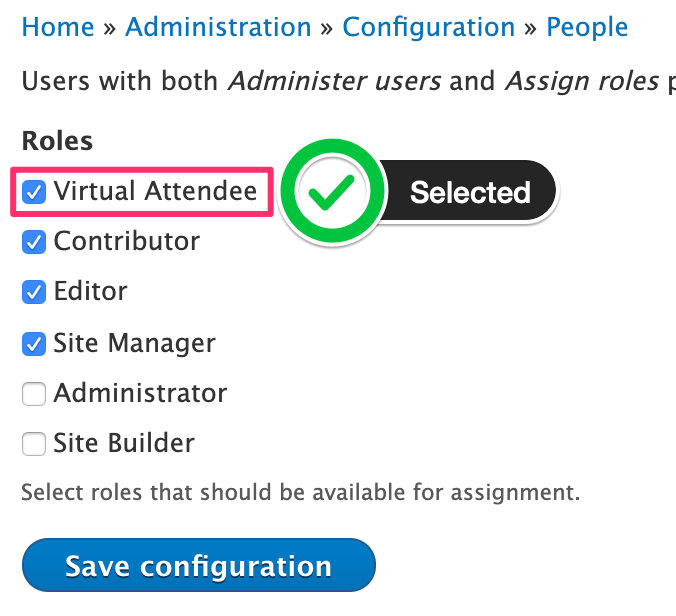
In the image to the left, the list of available Roles a Site Manager can select has been updated to include the new Virtual Attendee role. When a visitor submits an account request, this option will now show up for Site Managers in the People section.
Configure user account handling
Can be completed by: SiteFarm Team, Site Builder
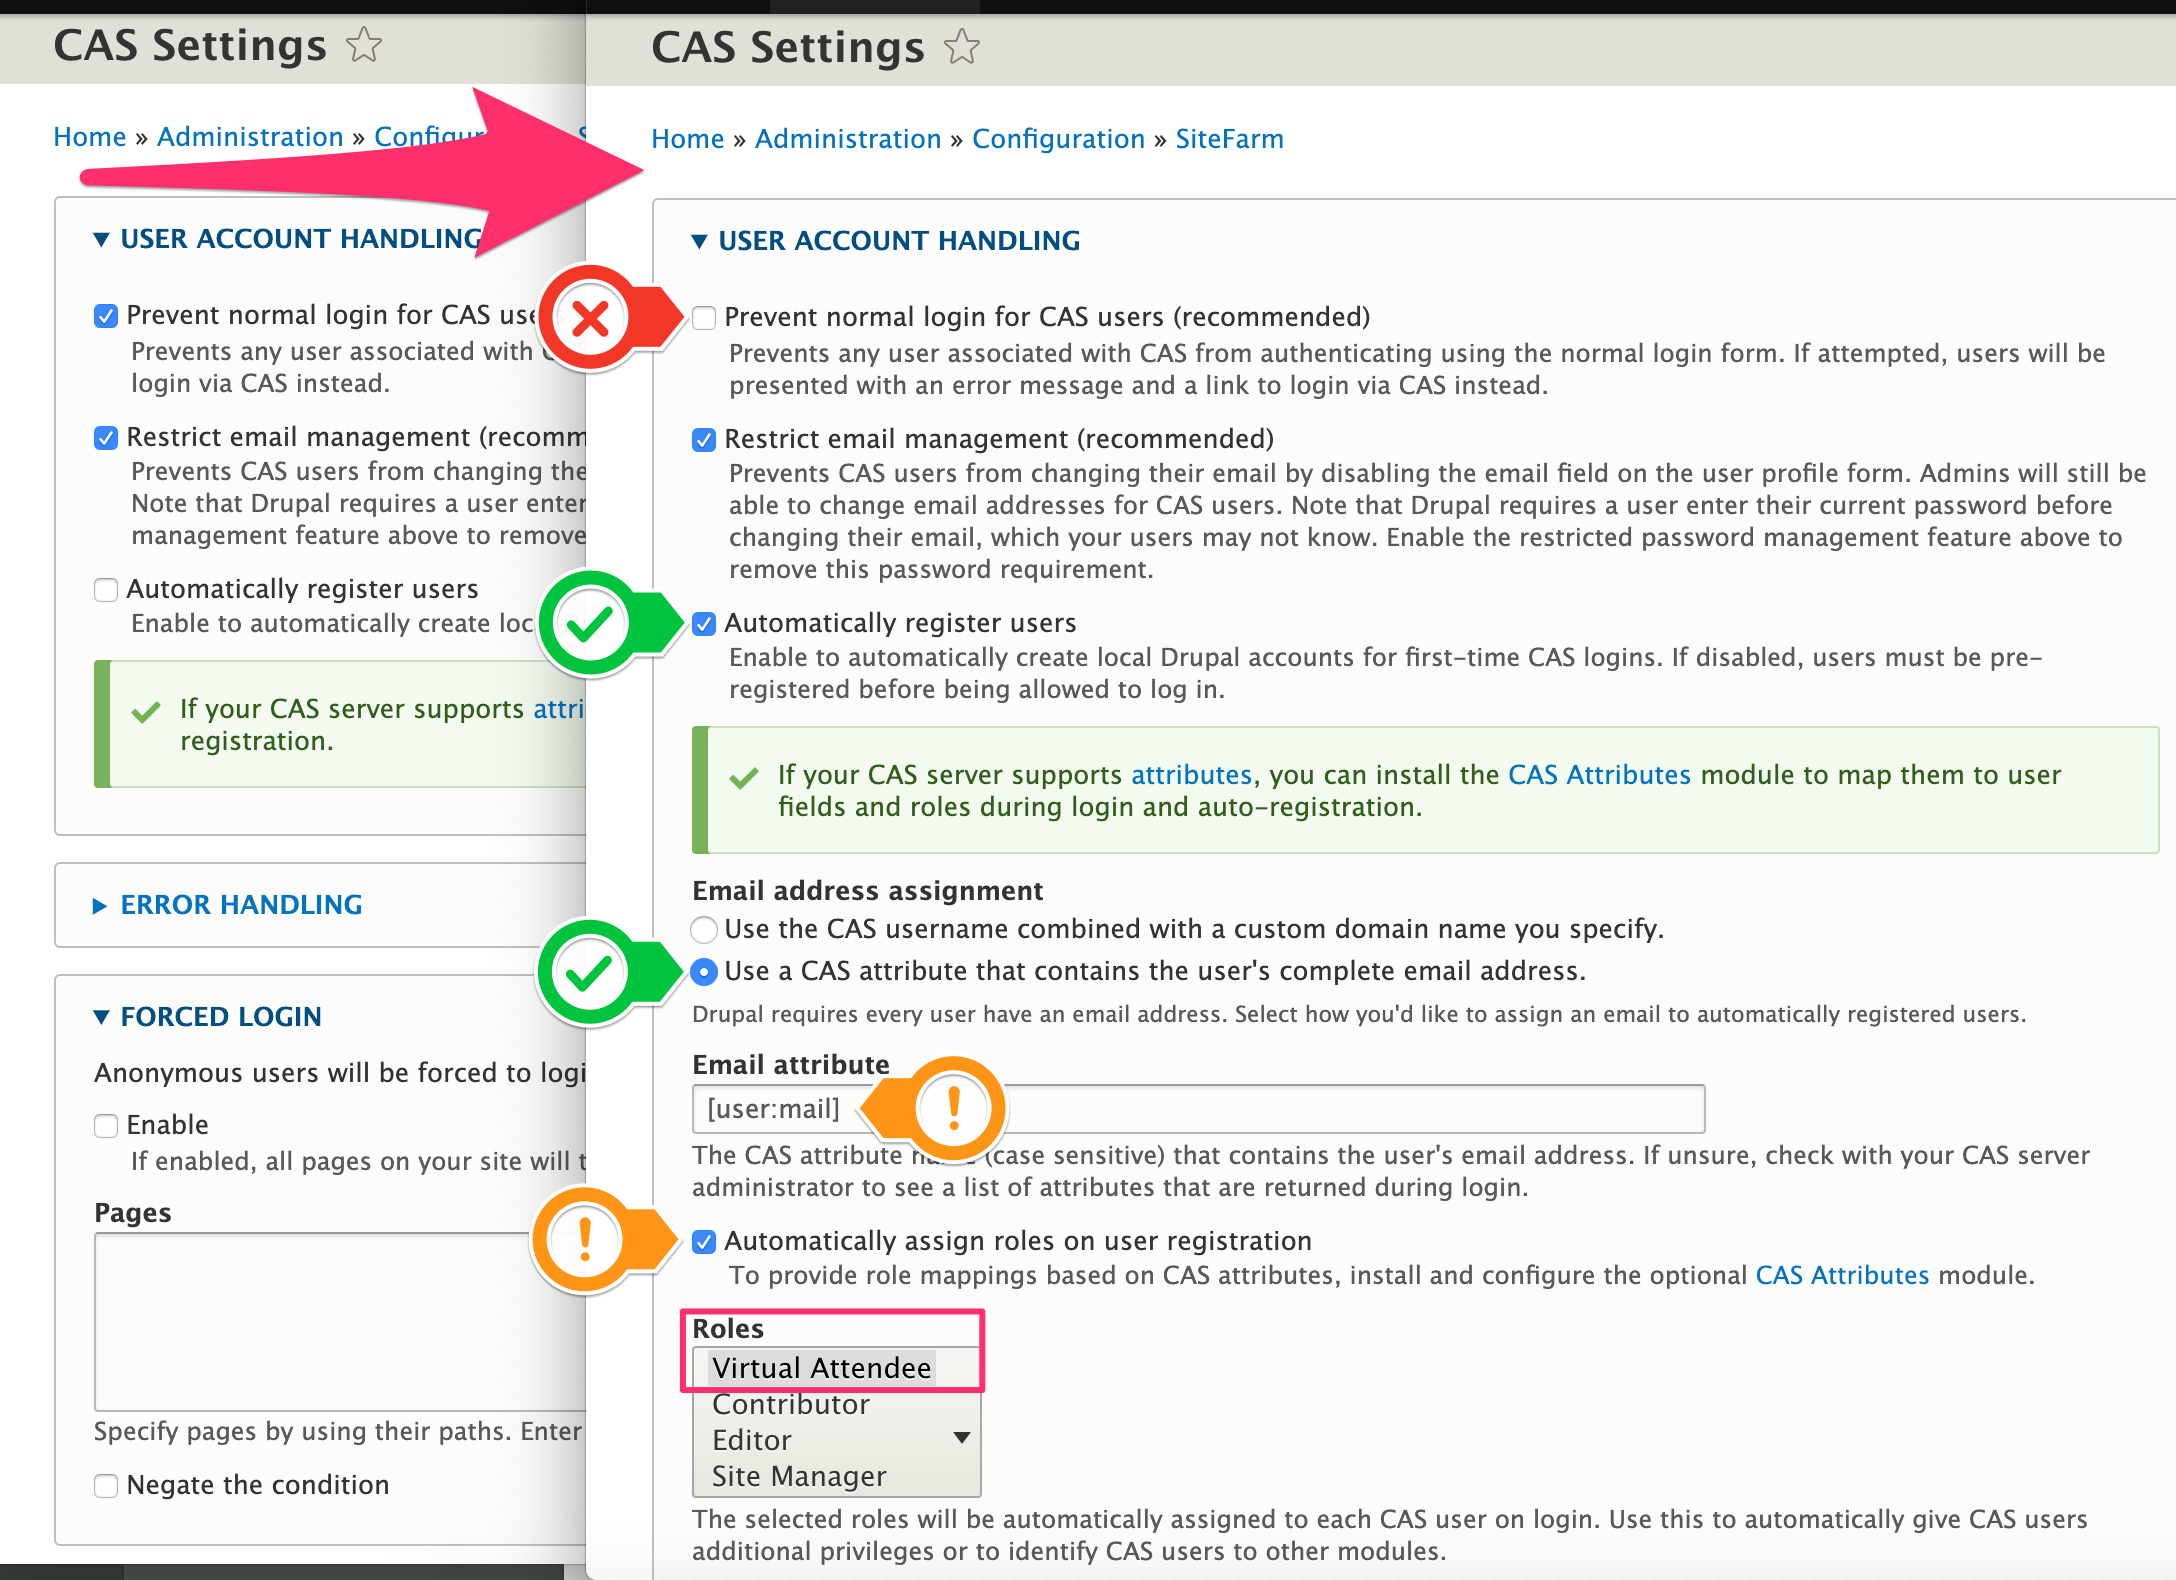
- Navigate to Manage » Configuration » SiteFarm section » CAS Settings » USER ACCOUNT HANDLING label.
- Make the following changes:
- Uncheck Prevent normal login
- No change to Restrict email management
- Check Automatically register users
- Select Use a CAS attribute under Email address assignment
- Email attribute: Insert the token [user:mail]. Make sure to use this same email address in your Basic Site Configuration contact information and your Contact form located at this pathway in your site: /admin/structure/contact and titled "Website Feedback".
- Check Automatically assign roles on user registration and select the created Role. In this case, it was Virtual Attendee.
Configure Forced Login
Can be completed by: SiteFarm Team, Site Manager, Site Builder
This section is what locks your site into an intranet configuration, but allows you to exclude specific pages in order to allow for basic functionality, like having a homepage to land on and options for creating an account and logging in and out of that account.
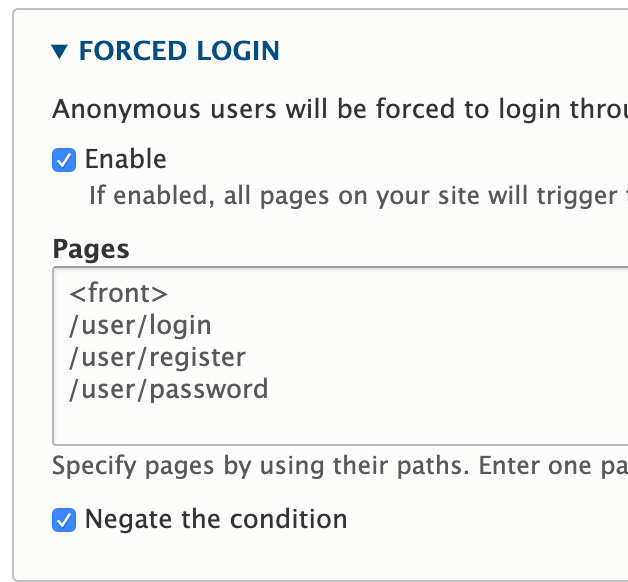 The screenshot on the right shows the necessary settings to provide basic functionality:
Enable - Checked. By default, if only this box is checked, the entire site is locked.
Negate the condition - Checked. By enabling this feature, it allows you to explicitly state which pages CAN be viewed by the public.
Pages - Specify pages by using their paths. Enter one path per line. The '*' character is a wildcard. An example path is /user/* for every user page. <front> is the front page.
In this use case, we are listing:
<front> - homepage
/user/login - the page available by default to allow visitors to choose to login with an existing account, create a new account, or request a password reset
/user/register - the page available by default that allows visitors to create an account
/user/password - the page available by default that allows visitors to request a password reset
If other pages need to be made public, they can be added here as well.
Configure Log Out Behavior
Can be completed by: SiteFarm Team, Site Manager, Site Builder
- Navigate to Manage » Configuration » SiteFarm section » CAS Settings » LOG OUT BEHAVIOR label.
- Locate the Log out destination field.
- Enter a backslash: /
- Doing so will send the visitor back to the homepage, which has been set to be visible and accessible to the public.
- Scroll to the bottom and click the Save configuration button to finish.
Account and Email settings
Configure Account Settings
Can be completed by: SiteFarm Team, Site Manager, Site Builder
The following settings deal with how accounts will be generated and what messages will be sent depending upon what part of the account creation process is triggered.
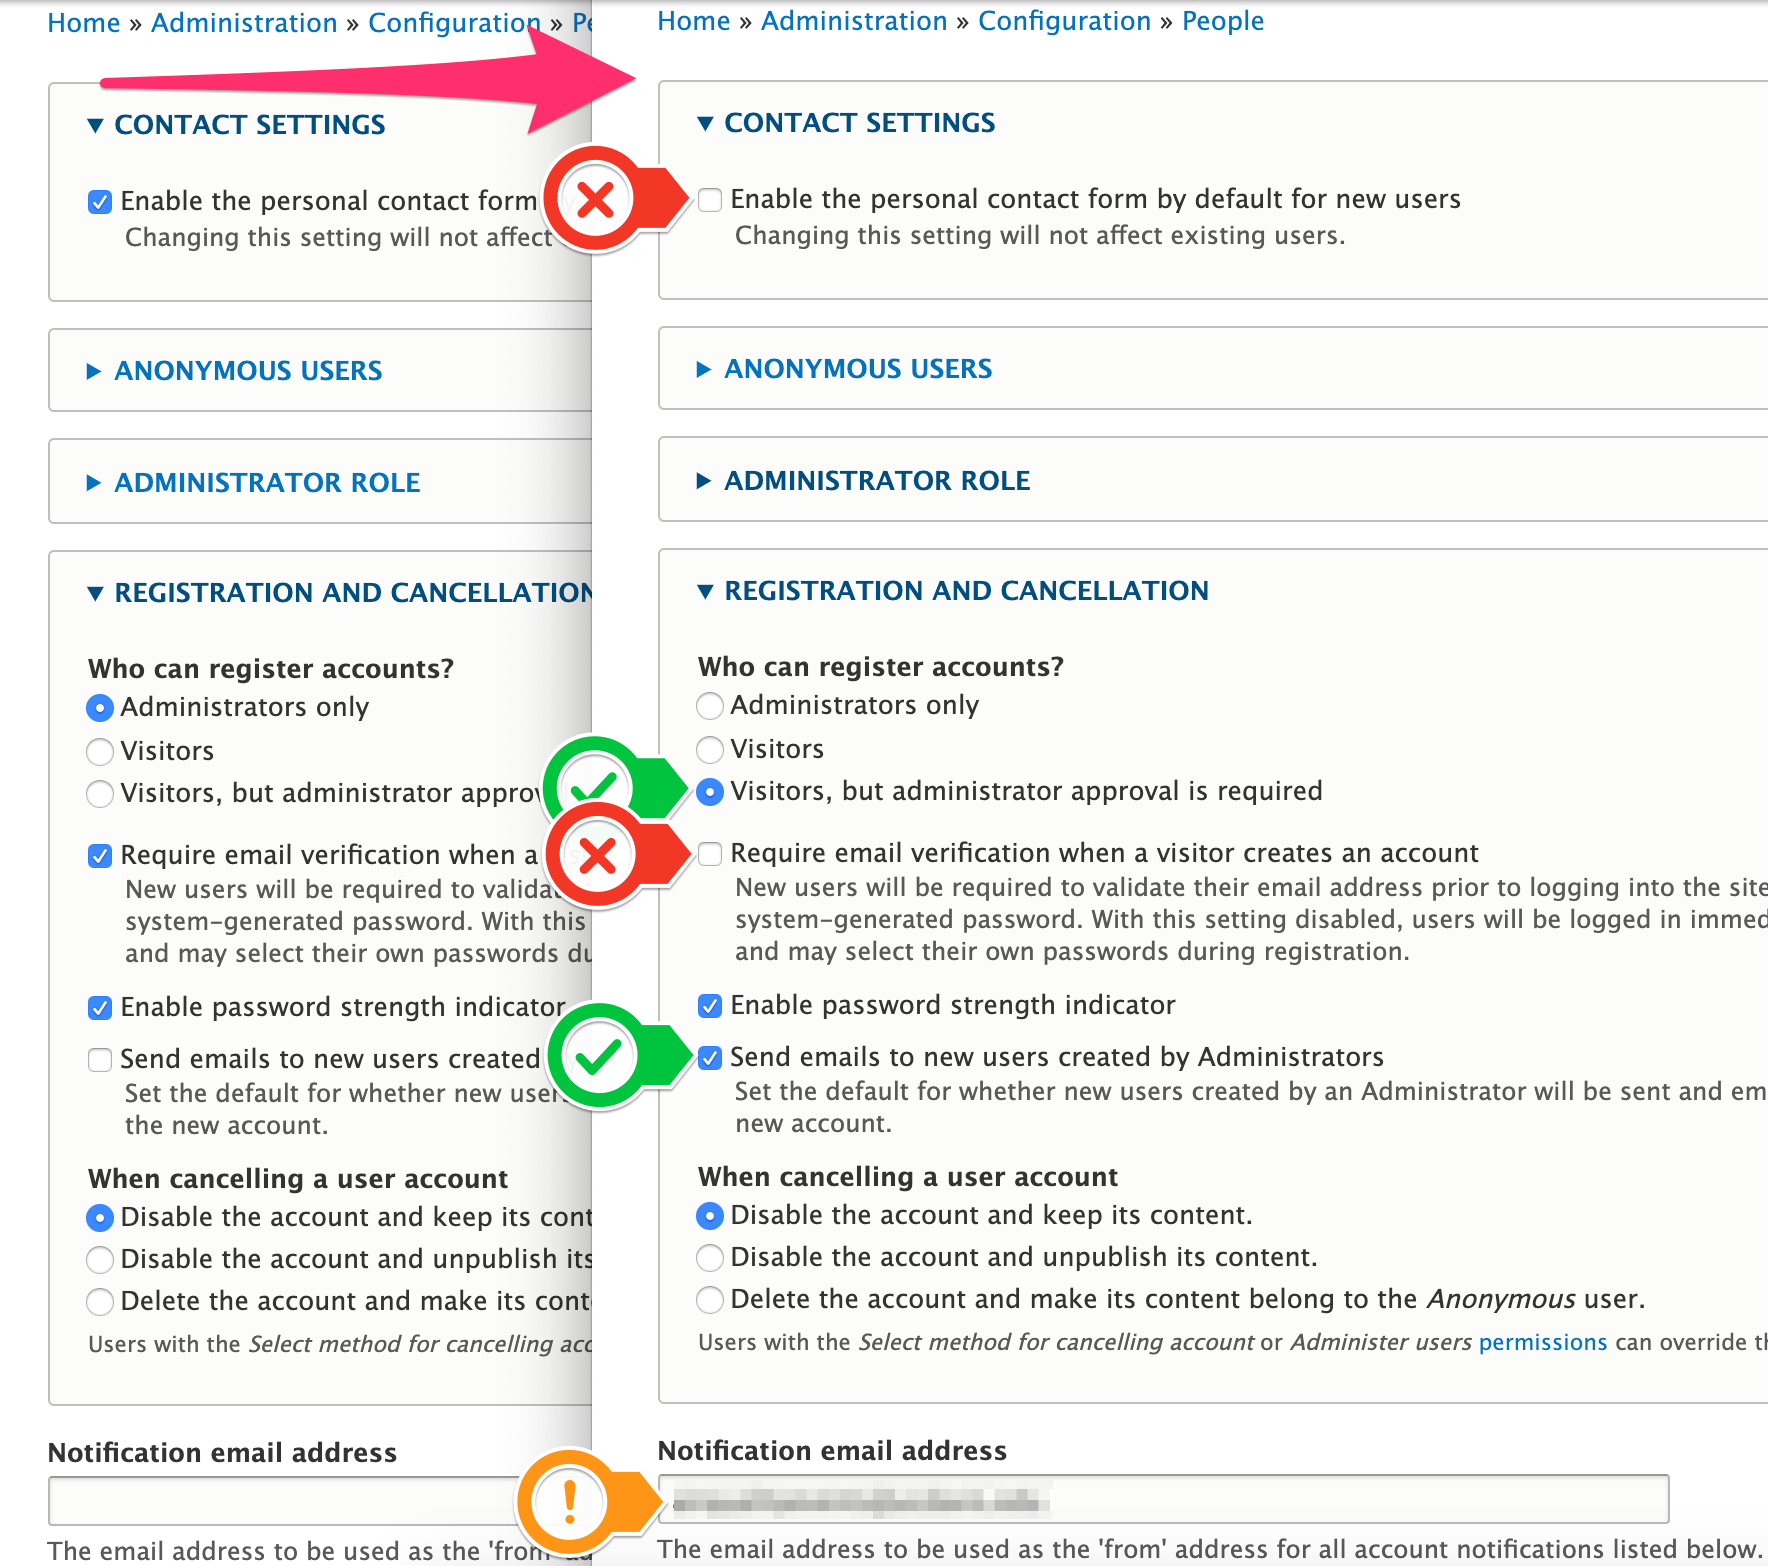
- Navigate to Manage » Configuration » SiteFarm section » Account Settings » CONTACT SETTINGS label.
- Uncheck the Enable the personal contact form... box.
- Navigate down to the REGISTRATION AND CANCELLATION label.
- Change Who can register accounts to Visitors, but administrator approval is required.
- Check the Send emails to new users created by Administrators box.
- Enter an official site email address in the Notification email address field.
Configure Email Settings
Can be completed by: SiteFarm Team, Site Manager, Site Builder
- Navigate down to the REGISTRATION AND CANCELLATION » Email section.
- Click on the tab labeled "Welcome (New user created by an administrator)". We will offer an example of the verbiage to use, but feel free to update it according to your needs.
- Update the Subject field to (excluding quotation marks):
"You have created an account at [site:name]" - Update the Body field to (excluding quotation marks):
"[user:display-name],
Thank you for registering at [site:name]. Your application for an account is currently pending approval. Once it has been approved, you will receive another email confirmation with instructions for viewing the live stream.
-- [site:name] team
- Update the Subject field to (excluding quotation marks):
- Click on the tab labeled "Welcome (awaiting approval)". We will offer an example of the verbiage to use, but feel free to update it according to your needs.
- Update the Subject field to (excluding quotation marks):
"Account details for [user:display-name] at [site:name] (pending admin approval)" Update the Body field to (excluding quotation marks):
"[user:display-name],Thank you for registering at [site:name]. Your application for an account is currently pending approval. Once it has been approved, you will receive another email containing information about how to log in, set your password, and other details."
- Update the Subject field to (excluding quotation marks):
- Click on the tab labeled "Account activation". We will offer an example of the verbiage to use, but feel free to update it according to your needs.
- Check the Notify user when account is activated box if it isn't already.
- Update the Subject field to (excluding quotation marks):
"Account details for [user:display-name] at [site:name] (approved)" - Update the Body field to (excluding quotation marks):
"[user:display-name],
Your account at [site:name] has been activated.
You may now log in by clicking this link or copying and pasting it into your browser:
[site:login-url]
username: [user:account-name]
password: Your password
You will be able to view the website only while logged in. If you have any questions, please let us know at [site:mail].
-- [site:name] team"
- Scroll to the bottom of the page and click the Save configuration button to finish.
Add Login and Logout Menu Links
Can be completed by: Site Manager
- Navigate to Shortcuts » Main Menu.
- Add two new links and make sure they are positioned at the bottom of your list so they will appear on the far right of the main navigation bar:
- Login link = /user/login
- Logout link = /user/logout
- Click the Save button to finish.
Note: only one of these links will appear on the main menu bar at a time depending on whether the person has logged in yet or not.
User Account Maintenance
Process for Activating account requests
Can be completed by: Site Manager
- When someone creates an account, the email account associated with your site will receive an automated notification. These can be updated further in Manage » Configuration » People section » Account Settings if the messages need to provide more information for ease of processing for your internal staff.
- Navigate to your Manage » People section and locate the name of the person indicated in the email notification received. You will see an entry for them, but they will be listed as Blocked and not have a Role assigned to them.
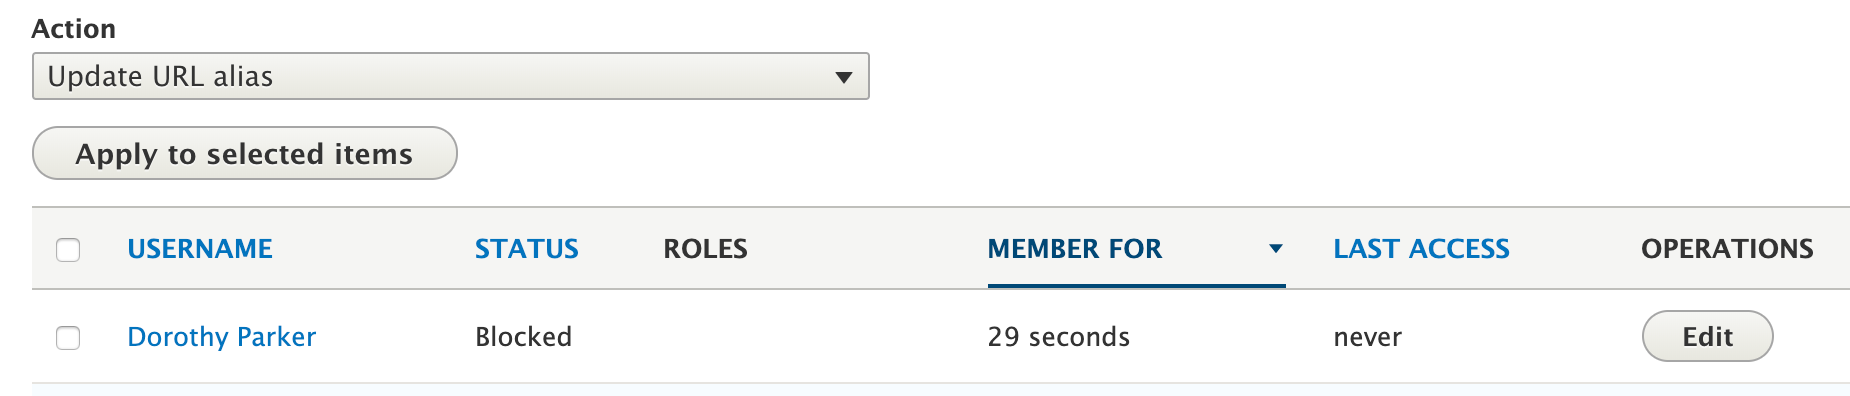
Example of a pending account. - Click on the account's corresponding Edit button.
- Change the account's Status to Active and assign the appropriate Role, which in this example is Virtual Attendee.

- Scroll to the bottom and click the Save button to finish. An automated message will be sent to the new account holder to provide them with the login information you entered in the Email Settings section.
Filter accounts by Role
Can be completed by: Site Manager
You may need to do some housekeeping with your list, either to remove all of the users or to modify/delete specific ones. Using the filter option makes this much easier.
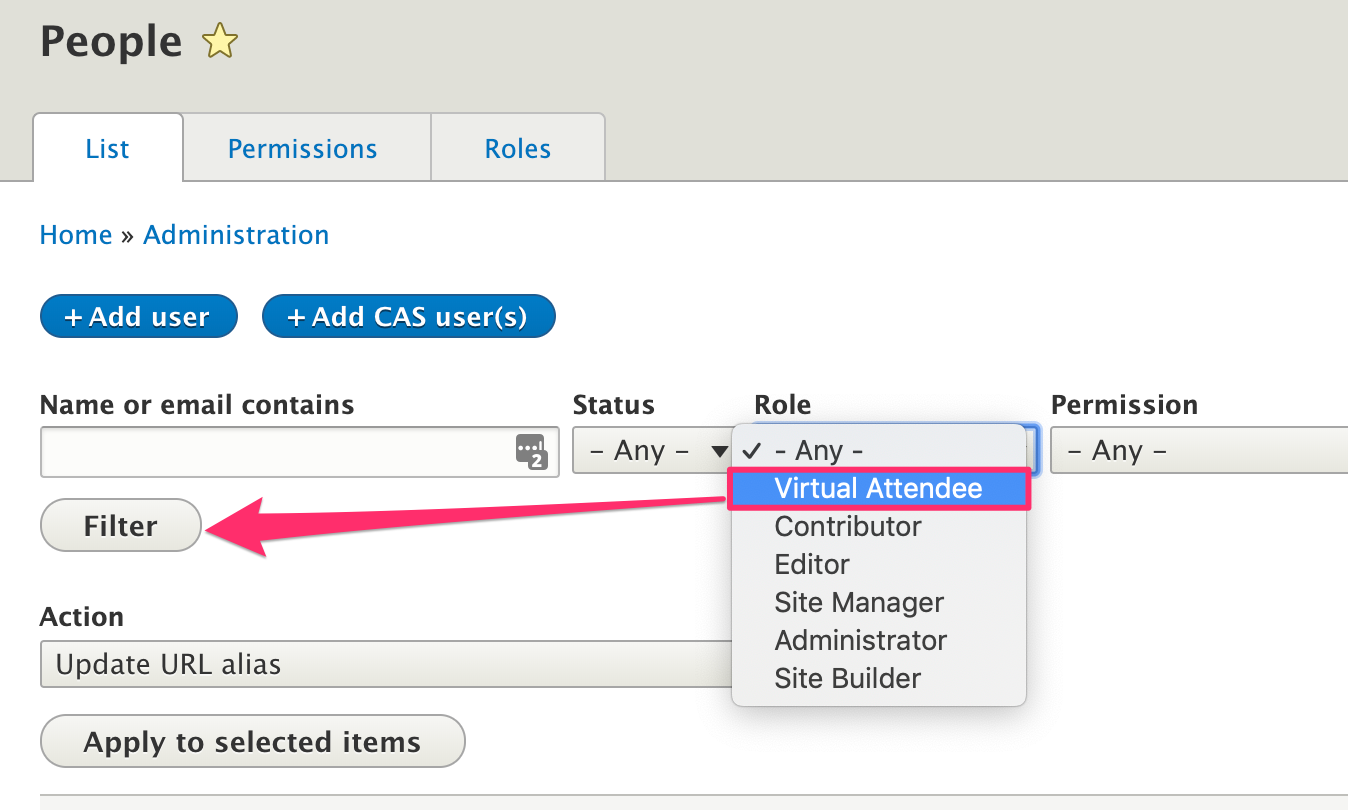
- Navigate to Manage » People.
- From the Filter, use the Role's drop-down menu to select your desired Role (our example is Virtual Attendee) and click the Filter button.
Delete a user account
Can be completed by: Site Manager
- Navigate to Manage » People.
- Locate the user account in the list and click the corresponding Edit button.
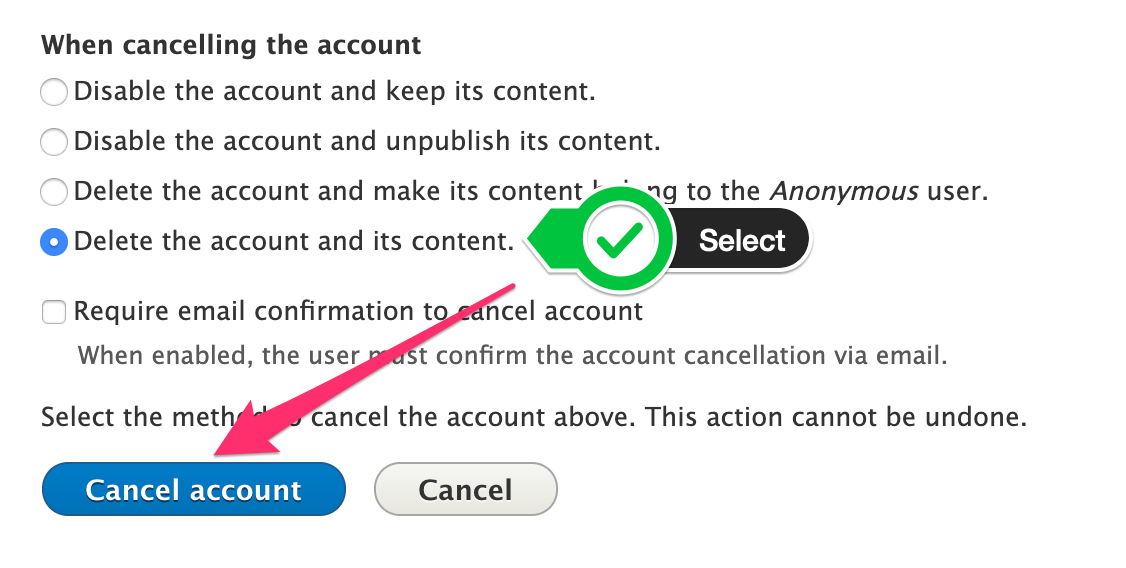
- From the user's profile screen, scroll to the bottom of the page and click the Cancel account link located next to the Save button.
- On the Are you sure you want to cancel the account for <user>? page, select Delete the account and its content.
- Click the Cancel account button to finish.
Final Comments
- We STRONGLY recommend thoroughly testing your registration process before making it live. You can keep it in limbo by waiting to enable the login and log out links. Test the creation and automated response steps by attempting to create a fake account using a browser's incognito mode.
- If you decide to implement this kind of intranet/registration system, let us know the name of the Role you would like to implement when you email us or complete the Service Request Form.